Rocket League Camera Settings Guide

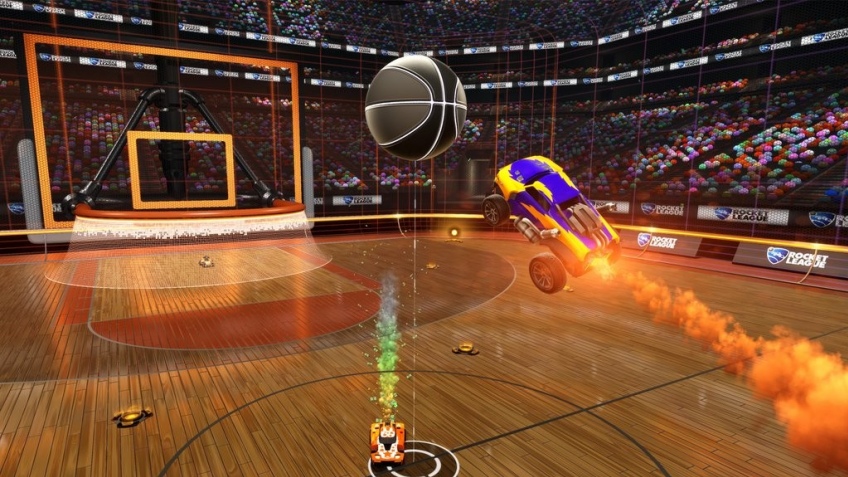
Rocket League might look like a simple and casual game at first glance, but once you spend some time with it you realize that it’s far from that. Rocket League has a pretty high skill ceiling and if you want to reach the top you’ll want to have every advantage possible. In our Rocket League Camera Settings & Controller Guide we want to give some recommendations on which settings to tune and which controller to pick.
Optimal Rocket League camera settings so you can control your car as precisely as possible. In this guide we’ll help you get started with fine tuning the game in order to have the best performance possible.
It is obviously to identify what the best Rocket League Camera Settings are supposed to be. We have analyzed close to a hundred professional Rocket League players in our to give you a great start to tune the settings to your liking.
Best Controller for Rocket League
Since there’s no massive variety within the popular controller options (there’s no difference in sensor or side buttons etc. such as with computer mice) it’s mostly up to what kind of shape and feel you prefer your controller to have. The has mostly the same features as the Xbox controllers, though the and both sport extra triggers and buttons, so if you feel like you’d benefit from having these extra means of input and you’ve got the cash to spare then by all means go for those.
A small but important side note; the Dualshock 4 works seamlessly with Rocket League on PC so you can just plug it into your USB port and start playing without having to download third party software.
Most Used Controllers for Rocket League
It’s no secret that Rocket League is best played with a controller. Which one you use is mostly up to preference. Most of our professionals opt for the and some choose to use the . Xbox controllers are the second most popular option. They are used by about 15% of Rocket League professionals in their various varieties (it’s about a 60/40 split between the and the and one pro opts for the . There’s also one professional who uses a Razer Raiju.
Controllers Used by Rocket League Pros
DualShock 4
72%
Xbox One
8%
DualShock 3
8%
Xbox 360
6%Over0%OF Rocket League PRos use the DualShock 4
Best Rocket League Camera Settings
The camera settings for Rocket League are quite important as they can drastically change the way you experience the game. It’s important to find settings here that work for you, as opposed to blindly copying the settings of your favorite professional. That being said though; it might be a good idea to use the settings used by our professionals as a starting point for configuring your own camera settings.
The cam settings are mostly up to preference but that doesn’t mean that there aren’t some settings that can make your gameplay better regardless.
Camshake
Is off with every pro we’ve analyzed so far. That’s because it serves no purpose to the game whatsoever. What it does is it makes the ‘camera’ shake a bit in order to simulate speed and ‘chaos’, so to speak. This makes the game a bit more immersive and might be a good idea in a story driven game but in a competitive setting it serves no use whatsoever. You want your vision to be as steady and clear as possible and you’ll want to eliminate every possible distraction so turn camshake to off for a more neutral and clear experience.
Most Used Camshake
Camshake OFF
100%
Camshake ON
0%
FOV
Stands for Field of View, i.e. your cone of vision. The higher this is, the larger your cone of vision is and the more you can see of the playing field. Turn this down too low and you’ll quite literally have tunnel vision. Naturally you’re at a disadvantage if you can’t see parts of the playing field in a game where you want a good overview of the pitch at all times, so most professionals choose to turn this setting to the highest possible, which is 110.
Around 70% of our professionals use the maximum FOV of 110. None of the professionals that we’ve analyzed has a FOV of under 100, which further indicates that at the highest levels it’s extremely important to have a good, broad view of the pitch. It’s probably best to emulate this, since you don’t want to be put at a disadvantage by seeing less of the field than your opponents do.
Most Used FOV
FOV 110
69%
FOV 105
7%
FOV 100
5%FOV used by Rocket League Pros0(Average)
Distance
This is the actual distance between your car and the camera. This is one of those settings where it comes down to personal preference. A higher camera distance means you’ll have a better view of the ball and what’s going on around it because the camera is further away (thus giving you a better overview) but you do generally have a more difficult time judging when your car is going to hit the ball, for example. So a high distance generally means you’ll get a better overview, but you lose a bit of ‘personal’ contact with your car and the ball. It’s up to you to decide which is better for you, but the professionals do generally agree on a certain range of distances so there’s something to say for using a setting within those parameters.
The average distance that the professionals use is around 270. Just make sure you know the advantages and disadvantages of a low/high distance and play around with this setting until you find the setting that’s exactly right for you.
Most Used Distance
Distance 260
21%
Distance 270
20%
Distance 280
19%
Distance 300
11%Distance used by Rocket League Pros0(Average)
Height
This setting changes the height of your camera. The higher this is, the more of an overview you’ll have, but you might have trouble aligning your car for aerial shots because it’s more difficult to judge when you’re at the same height as the ball if the camera is floating too far above your car.
As with distance, this setting is mostly based on preference but the professionals seem to agree on a height between 100 and 130, with the average being ~110.
Most Used Height
Height 110
51%
Height 100
23%
Height 130
10%
Distance 120
8%
Angle
This setting changes the angle at which the camera is viewing your car. You don’t want to be looking down upon your car as if you’re looking at it from a bird’s eye view because you won’t be able to align shots at height but you also don’t want the angle to be too flat because then you won’t have a good overview of the pitch in front of you.
Most Used Angle
Angle -3
39%
Angle -4
29%
Angle -5
14%
Camera Stiffness
This basically means how ‘loose’ the camera is when following your car. At the lowest setting the camera will zoom out quite far when you’re going at super high speeds, or ‘trail’ behind your car a bit when drifting. The higher this setting is, the more rigidly the camera follows your car. An easy way to visualise this setting is to imagine that there’s an actual camera following your car. At the lowest setting this camera is attached to a spring, which makes the camera follow your car quite loosely and ‘over the place’ and at the highest setting this camera is attached to your car with a solid iron rod, making it follow your every move without wobbling at all.
This setting is also mostly based on preference (there are some who like the loose effect when drifting because it gives a better overview of the pitch and then there are people who want it to be as stiff as possible for aerials, for example) but the professionals, on average, use a camera stiffness of 0.43. Most people don’t even know what camera stiffness is so now that you know it’s best to just fiddle with it a bit and figure out what kind of style you like, because there’s not really a ‘best’ setting to go with here.
Most Used Camera Stiffness
Camera Stiffness 0.40
17%
Camera Stiffness 0.45
15%
Camera Stiffness 0.35
14%
Swivel Speed
This is basically the ‘sensitivity’ of your camera. It all depends on how fast you want your camera to turn when you use it. Some like it to turn super fast so they can ‘look at the action’ as fast as possible and others want it to turn slower so that they have more control over where they’re looking exactly. There are arguments for both sides so again it’s best to experiment with this one and use whichever setting you find works best for you. For reference; the professionals use, on average, 5.3.
Swivel Speed used by Rocket League Pros0.3(Average)
Toggle Ballcam
This is to choose whether you want to hold the button which activates the ballcam (and return to your car cam when you release the button) or whether you want to toggle it. This, again, is preference though there is something to be said about not having to worry about keeping your finger on a button when doing all sort of complex maneuvers. The professionals seem to agree with that, since 87% choose to toggle their ballcam instead of holding it.
Toggle Ballcam used by Rocket League Pros0%
Vibration
This setting is probably the one that comes down to preference the most. However, if you have the vibration setting activated on your controller, it will lose battery life more quickly. For most people it is just a distraction though, which you don’t want to have in competitive games. While it is the setting with the least impact on your gameplay, we still recommend you to turn it off since it doesn’t offer any significant benefits.
Deadzone
Controller deadzone is a setting that lets you configure how sensitive you want your stick to be. This means that the stick will only register the movement once you are over the “deadzone” which you have set up. The lower you have this setting, the more sensitive it will feel. Most Rocket League pros seem to be using a range from 0.05 (= 5%) to 0.15 (= 15%) with the usual outliers. We suggest you to start with 0.15 since it becomes exceedingly harder to play the lower you go.
Camera & Controller Settings Summary
Overall there are two settings which definitely give most people a competitive edge, namely FOV and camera shake. The other settings are mostly based on preferences, though the professionals generally do stay within certain parameters and if all of the professionals are in agreement then there must be something to it, right? Overall though it’s best to use this as a guide, as settings (as with any game) are a personal thing and if it works for you then that’s great, even if it doesn’t work for anyone else.
Over0%OF Rocket League PRos use FOV 110
Best Rocket League Video Settings
As with any competitive game you’ll want Rocket League to run as smoothly as possible. You don’t want to miss that sweet airshot goal because there’s input lag or let a goal through because your frames dropped. That’s why we’ve compiled this list of video settings which you should tweak in order to get the best performance out of your game.
Video Settings
Just use the native resolution of your screen. There’s no real benefit to gain from using different resolutions or aspect ratios in this game. However, if you are having troubles getting to a stable frame rate, you might want to consider lowering this to 720p or even lower. Please also consider changing the Render Quality (mentioned further below) which has a similar effect while keeping the it at your monitors native resolution.It’s probably best to go for Fullscreen. Borderless has been known to come with input lag.
This definitely causes input lag so turn this off, unless the screen tearing is utterly unbearable that you cannot play the game any longer.You’ll want to run this either at FXAA Low or FXAA High if your system can handle it. MLAA takes up a huge chunk of performance and it doesn’t make the game look all that much better when compared to FXAA. If you want to maximize FPS then keep it at FXAA Low but if you’ve got some FPS to spare then feel free to use FXAA high. Put this on High Quality. Anything lower will make your game look like a first generation 3DS game and while there is something to be said about looks vs performance you also don’t want your game to look too grainy.This’ll be put to custom because we’re gonna adjust the values ourselves.This doesn’t seem to have a whole lot of effect on performance so you’re free to set this to High Quality. You can go lower but that’d only be necessary if your PC can barely handle the game and you want to squeeze out every drop of performance.
This is another setting that won’t have too much effect on your system performance. The lower you go the less ‘distractions’ there are on and around the field though. There’s less clutter and, well… world detail if you turn this off so it’s mostly up to you and if you care about these distractions.Leave it on unless you absolutely HAVE to squeeze out performance. The game looks very grainy and flat with this setting off though, so for most players it’s best to leave it on.This basically handles the shadows in the game. Its effect isn’t all that noticeable and you don’t really need nice looking shadows in this game either way so turn this off.This causes things that are far away to look a bit more blurry (thus emulating real life) and makes objects closer to you appear sharper. Turning it off makes every object in the game world look equally sharp so you might want to turn this setting off.Bloom handles the lighting in the game. When it’s turned on the light ‘bleeds’ on more realistically through and on different objects in the game world, creating a better and more lively atmosphere. The bloom effect in Rocket League isn’t all that drastic though so you can definitely leave this on if you want to. Unless (again) you desperately need the performance. Also called ‘God Rays’, they’re the beams of light you see coming from the sun. This can cause minor distractions and isn’t all that necessary in a game such as Rocket League so it’s best to turn this off. This is the ‘blinding’ effect you get when staring directly into a light source. While this might make the game feel more realistic it also limits your vision so turn this setting to off, no matter how good your system is. This handles the moving (thus ‘dynamic) shadows in the game. In a game such as Rocket League this can be of massive help (you can see the shadow of an opposing player above you, for example) but it does come at a relatively large cost performance wise. Turn this off if you need the FPS but otherwise I’d say it’s worth the tradeoff of leaving it on.Off. You don’t want your vision to be blurred when playing a game such as this.Off. It’s only purpose is to make the game prettier and since you’re probably here to get an edge regarding performance you’ll want to turn this off as the weather is of no use to you in this game.Set this to the highest possible option. The more FPS you get, the smoother your game will be and the better it’ll respond to your input.
All0%of Rocket League PROS have Camera Shake OFF
Conclusion
Rocket League isn’t a very demanding on your PC hardware. In essence you just need a (decent) controller and a fairly competent PC but that doesn’t mean that there aren’t any settings or tweaks which can help your performance. We hope that this guide will serve as a good starting point for you to figure out your own settings and work out what’s best for you. Because in the end these will be your settings and your game. If you feel like using super weird camera settings then go for it if it works for you. This guide is merely that; a guide. Good luck out there and remember to have fun!


Comments
There are no comments yet